Clementine's Garage
Clementine the Cat
 
Image of flower
Yellow R4
 
Réparateur d'automobiles

Changing suspension bushes

iMacThere4iAm

Tom Long
Messages
750
Location
Morecambe
THe Haynes manual says that changing wishbone bushes is not practical and doesn't give any details as to why. Has anyone done this before?

I'm also having great difficulty identifying the correct bushes for my GTL. I have found the following Renault numbers:

Upper wishbone bushes (I think these are the same?):
77 00 104 152
77 02 111 568
Lower wishbone bushes (Maybe, although in the photo it looks too short?):
77 00 518 392

It's hard to cross-reference with Franzose and Melun because they don't include Renault part numbers in the catalogues.

The longer I spend looking at catalogues, the more confused I get. Help?! :confused:
 
MR 175 gives quite a lot of detail for this and it looks reasonably straightforwards for the upper arm, but for the lower, there is quite a lot of dismantling of associated suspension components and, of course, the torsion bar, which would be a significant item (see Malcolm's website) . It also recommends checking castor and camber settings post reassembly. This is awkward without the right tools. It would probably be worth changing the ball joints as well whilst everything is in pieces.
 
Thanks, I'll have a look at MR 175. I know the torsion bars are tricky, but my ride height is very wonky so there's another good reason to tackle the job. Likewise my camber is way off so that's another job that needs doing anyway. I have a full set of ball joints - those are quite simple to order!
 
I was about to ask the same question. How do you replace the bushes in the lower wishbone?

20120907144959.jpg

20120907145018.jpg
 
Hi! This images were extracted from a post on Argentina Renault 4 Club Forum and were originally posted by user lord_dga and show a home made way to change those bushes with near to 0 tools.

(http://foror4.informe.com/viewtopic.php?t=3505)

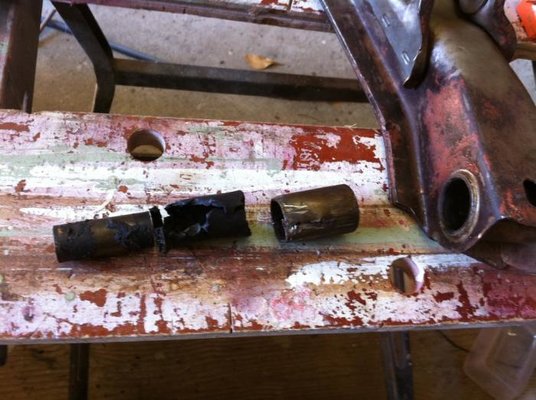
Step 1 : Burn rubber bushes (avoid over heating cause it will weaken the metal parts)

20120830171558806.jpg


20120830171553750.jpg


20120830172700191.jpg


Step 2 : Cut with a saw the internal metal bush

20120831160453933.jpg


20120831160457817.jpg


Advice : try not to cut too deep or you will harm the part.

Step 3 :Extract the internal bush using and old screw driver or any other metal tool and a hammer

20120831162012135.jpg


20120830172651434.jpg


2012083116222684.jpg


This was the most sensible part you should be trully carefull not harming the part with the hammer.
 
Step 4: use sand paper to clean the part

20120901155510644.jpg


Step 5 : Assembly the new bushes

To do this he used a large screw and a tube wrench as seen on the pictures

20120901155630387.jpg


tubo 30mm = tube wrench 30 milimiters
Buje = Bush
Bulon M10 x 120mm = Screw 10 mm x 120 mm long

20120901160652592.jpg


Before assembling the bush use some grease to make it easier

Finally the bush in position

20120901160658452.jpg


Hope this will be helpfull.

And thanks to my local forum user lord_dga for the pictures and information!

P.D. : I know my English is not the best, but, hope you'll understand anyway

Regards

Matias
 
Hi Matias,
Thanks for your post, but the images don't work - I think you have to be a member of the Argentinian forum to see them. Can you download them and attach them to your post so we can see them?
 
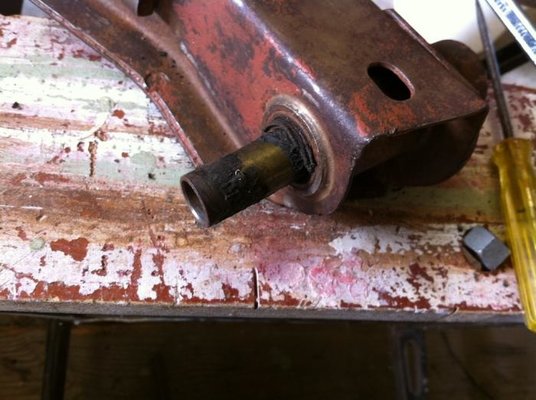
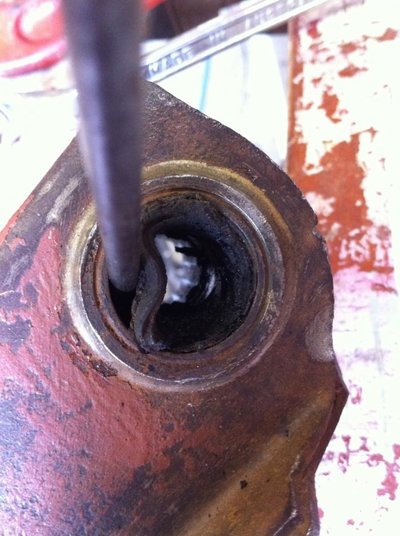
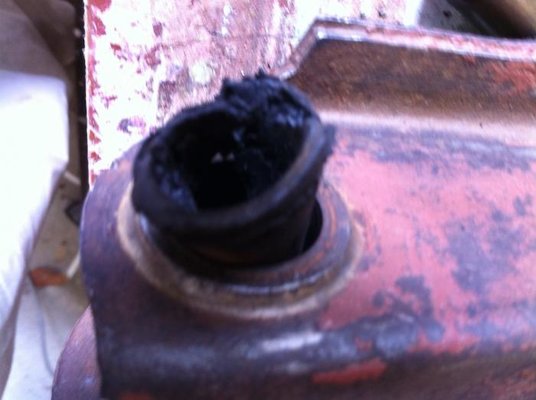
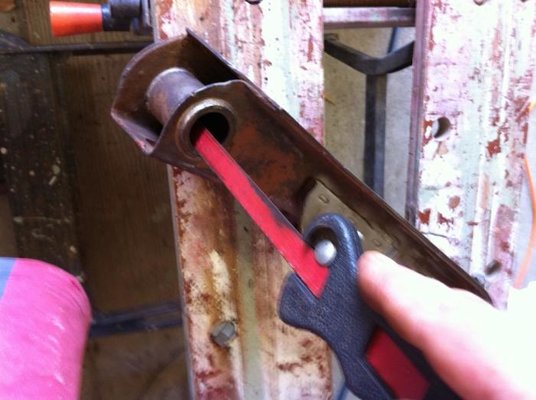
Matias' approach is the much the same as I did, except my bushes were shot enough that I could simply push the inner sleeve and then peel the rubber out from the outer sleeve.

I simply used a long bolt through the bush and then through a suitable size socket as a screw press to remove the inner sleeve.

Pictures show the main steps.
 
  • IMG_0018.jpg
    IMG_0018.jpg
    56.2 KB · Views: 222
  • IMG_0019.jpg
    IMG_0019.jpg
    87.8 KB · Views: 224
  • IMG_0020.jpg
    IMG_0020.jpg
    38.5 KB · Views: 217
  • IMG_0021.jpg
    IMG_0021.jpg
    48.3 KB · Views: 222
  • IMG_0022.jpg
    IMG_0022.jpg
    62.7 KB · Views: 223
I don't know why the Haynes manual is so scared of the upper bushes. They're straightforward to press out.
When pressing the new ones in, the distance between the two bushes needs to match the size of the carrier that goes between them. I suppose that's a bit obvious, but the number of times I've discovered the obvious after the event . . .

Geoff
 
Hi tom...
If you look for a seller on ebay called dataporo i get all my bushes from him...he gives the renault numbers as a referencr. I can have a look and send you a link on monday cos im in a camper for weekend..
 
On top of all of these, it's equally important that, when refitting the wishbones, their pivot pins are tightened when the suspension is at its datum position. Renault supplied a special tool for this (of course), but fortunately the job can be done without this.

Fit all suspension parts (do not tighten the wishbone pins fully yet) except for the torsion bar, and using a jack compress the suspension until the upper wishbone is slightly higher than parallel to the ground (5-10 degrees). Now you can tighten the wishbone pins to the specified torque.
 
Back
Top