Clementine's Garage
Clementine the Cat
 
Image of flower
Yellow R4
 
Réparateur d'automobiles

Renault 4 Rear Suspension End Wrapping - Close off spaces for dirt

I'm working on full wheelarch liners at the moment to help protect those other bits that are even more of a pain to weld. Great deal of interest in them but mostly the interest is for plans. Can't think how to do plans as the shape is complex, so perhaps the yacht could be had selling paper templates.
 
You'll get there Malc-just remember when your yachting off into that sunset we need you to look for some sexy R4-bitz under the palms for the rest of us..
-I see your problem with the ABS it's got to be flexible but not too much and it's got to have good brackets to hold it-the ABS I worked with years ago was kind of porous on the inside, if stressed it turned whitish and cracked if not relieved.. I'd use Large spacers under all bolts and screws.. Woul'd it be a poss to cut the structure in the middle (What would it be-longditudinally??)put in ,adjust for width by slits to fasten down screws? could be made waterproof by using Sikaflex in slits after adjustment...
Another thought-how about making them Approximate and use glued-on/riveted/vulcanized rubber as outlines? it's hard to get solid stuff like ABS fit precisely-especially as one 4 seldom is like the other one in measurements or fit....
 
Excellent - you can be the yacht driver. (I don't know the first thing about seafaring other than a few phrases said with an appropriate accent that I've picked up from pirate films.)

Going for big squashy rubber edge seals at the moment though they cost £50 for 4 liners. The ABS is OK if you bend it using a heat gun and fasten it with the proper plastic fasteners. It's a wonder material - would be ideal to replace steel for your covers - could get a fair amount of spring in it.
 
does anyone use a chunk of zinc to hold rust at bay? I've been thinking about getting a block of it and just attaching it the frame of my DS. Act as an anode. It would have to work you would think but might attract rust to the point of contact on the chassis or wherever.
 
I've posted about Zink-anodes before on here-Good idea as long as there is sufficient moisture to "trigger"them..Remember to get a good paint/grease/oli-free connection.
 
Object Any Cost-the follow-up & finished product...

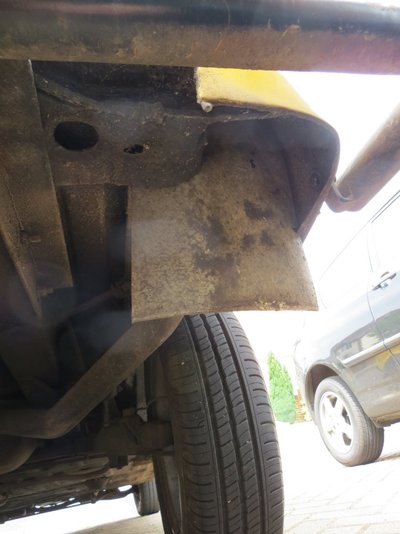
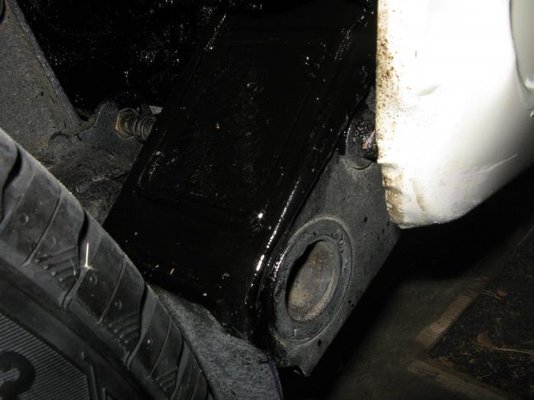
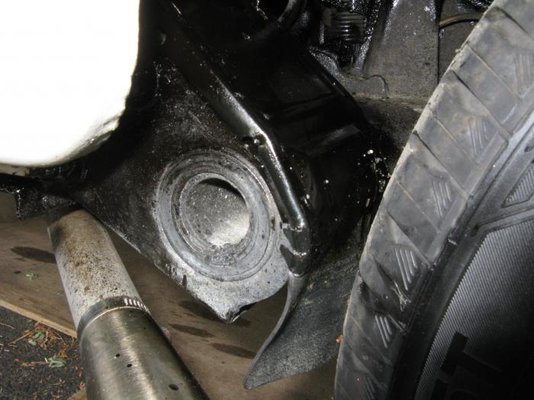
ok guys-pic1 and 2 shows mud-shields w/rubber splash-guard in place..
lacking several phrases in French so took the wheels off first..

IMG_0473.jpg

I ended up cutting 2 pieces out of the inner-hose-cut them so they cover
All of the underside of shield/cover plus 1cm in front. dabbed on some contact-glue,but rubber is held in place when all is mounted.

IMG_0474.jpg

Also cut two slits on each bracket to clear profile upper/front Easy-just sawed about 4cm so they now go all the way plus rubber goes in front and over so no metal-to metal contact..
Sprayed on a nice layer of..All together now....Thin Stuff.. should be ok till next time..All accessible as is so no sweat renewing....
If you look closely you will see where I pushed in the sides of bracket to lock nicely in place.... They both go all the way forward with some....Thin stuff should be ok.

Ok-Tomorrow I'm off... Goodbye World! -R.
 
Thats Genius !!!!
Will have a go at that when I get nearer the end !

Anyone got any ideas.
1. Ive 1/2 rebuilt the right hand side outrigger.
2. Tried to test fit the suspension.
3. Left hand side I haven't touched is way out on the tracking but doesn't seem to adjust very easily or to a sensible alignment (Might try more force)?
4. Right hand side which I welded with a jig seems ok and adjusts nicely

Argh !

Any ideas or is it useless trying to adjust it without the body on ?

(Its out by about 10mm)

Many thanks,
Andrew
 
A long-time-ago thread I know, and perhaps covered in a slightly different way before (apart from REIDALPINE above), but I couldn't find anything very similar so below is my simple take on a DIY rear wheelarch mud-protector.

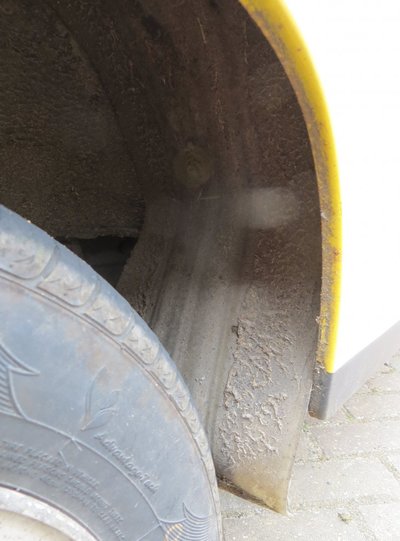
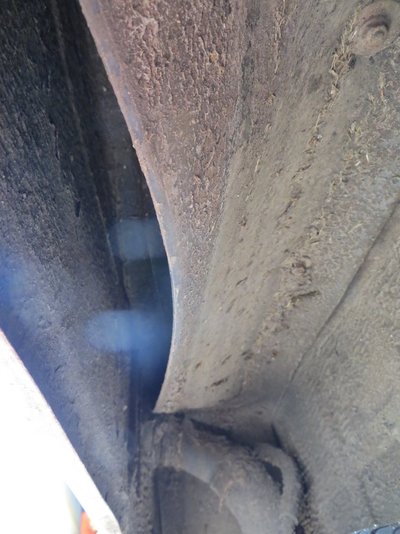
Over a year ago I bolted in some rear flexible wheelarch liners/ splash-guards which still seem to be effective, and require almost no cutting or templating! I used 2 metres of clear flexible PVC 200mm wide 3mm thick used for industrial cutains /doors (the type one drives through in a fork-lift truck in a warehouse, for instance) . I found 4 metres was just right (2 metres each side), fixing the PVC strip up to the inner wheel arches with big washers & 6mm nuts/bolts, and rivetting it to a small aluminium angle-bracket which is then rivetted to the bottom of the suspension pivot at the front (see photos!).
The strip seems to cover the inner wheelarches, the rear suspension catastrophe and other mud-traps quite well. It has drooped slightly where I have bolted the strip near to the edge across the top section, but still stops the mud getting above. It doesn't protect the fuel filler-pipe but it was simpler to go around it at the time.

The tell-tale stripes of flung water & mud show that the guards are doing their job.
Small mud-flaps at rear an added bonus!
I may buy non-clear PVC next time (I bought the clear from here, and this is the coloured options: http://www.ebay.co.uk/itm/Coloured-...hash=item3a903e12fb:m:mlA_f1pBxJuMTvqvt4UOwRw ), as looks a bit odd from the rear. As you can see, the van is spotlessly clean all the time, ha ha.

The mud at the front of the guard (below) is of course from the front wheels:
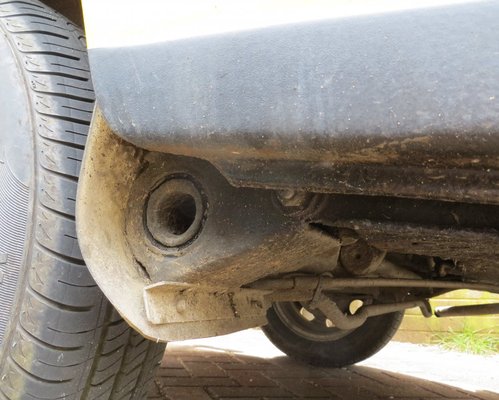
rear wheelarch guards (5).JPG

Front of offside wheelarch, showing suspension mud-trap protected :) and rear flap as the 2 metres of PVC comes to an end:
rear wheelarch guards (2).JPG rear wheelarch guards (1).JPG

Looking backwards up into the offside rear arch, with the outer wing on the left (is that cracking underseal?), showing a bit of droop in the flexible PVC as it travells horizontally, and three of the fixing bolts (the heads of which are easily accessible for inevitable angle-grinder-removal in the future!). The water/mud spray-striping on the PVC also shows that it is still stopping most spray & mud reaching the inner wing:
rear wheelarch guards (4).JPG
 
Last edited:
Back
Top