Clementine's Garage
Clementine the Cat
 
Image of flower
Yellow R4
 
Réparateur d'automobiles

What I am doing!

Hi Paul

These covers are a '60's /70's pattern but made for GTL seats at my request.
They came from an ebay supplier the same I guess that makes for Der Franzose.
So yes the checked GTL format ones will also be available. I do still have my old ones if they are of any use?
Fair to moderate condition


Paul your email bounces. Cost is £5.50 to post

PM me and I can email you
 
More bits on this weekend
 
  • image.jpeg
    image.jpeg
    231.6 KB · Views: 48
  • image.jpeg
    image.jpeg
    102.3 KB · Views: 7
  • image.jpeg
    image.jpeg
    171.6 KB · Views: 8
  • image.jpeg
    image.jpeg
    236.6 KB · Views: 7
  • image.jpeg
    image.jpeg
    187.9 KB · Views: 7
  • image.jpeg
    image.jpeg
    174.4 KB · Views: 7
The front bumper took me ages to do a good 3 hrs assembled loose then tightened to get it level and true. The holes for one love handle fixing had to be re drilled to make symmetrical and a good fit.
 
That Anti Roll bar I have a hopeful feeling was the last rusty bit go restore. Now all shiny and smooth.
I did forget the stiffening cross bar under the engine. But by jacking the engine upward at the back I was able to wiggle it into position and retrofit
 
Nice looking manifold you have.

You have painted it? What king of color?

And nuts....copper one.....new or painted?
 
Nice looking manifold you have.

You have painted it? What king of color?

And nuts....copper one.....new or painted?
Hi Petak

The manifold is in a matt black and was professionally finished for me when I had the powder coated bits done (wheels, battery tray, engine cross bridge, air filter, radiator stays) . However im not too sure about it as it seems to mark easily. I wonder if they used a cheap aerosol then charged me a load of money :whistle: 
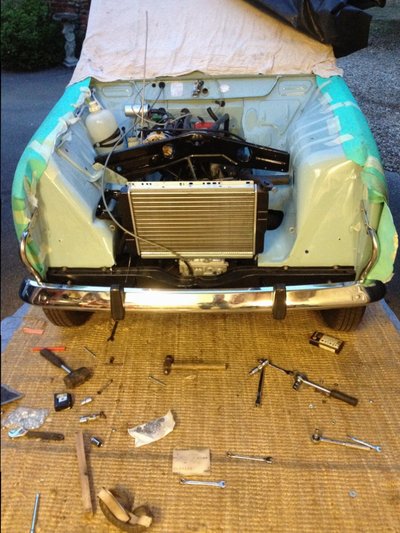
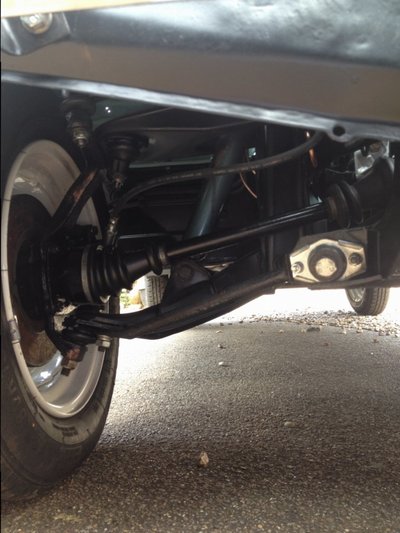
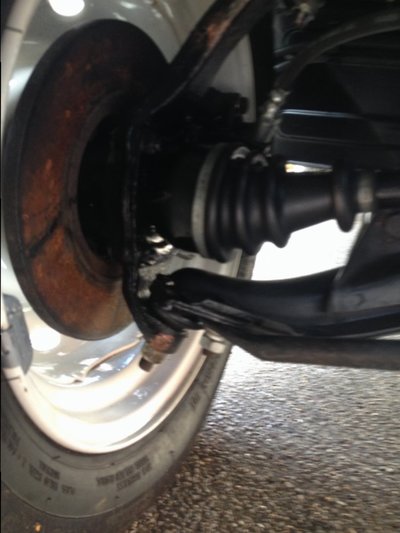
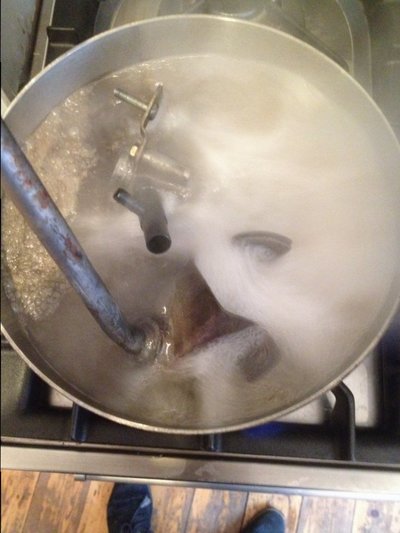
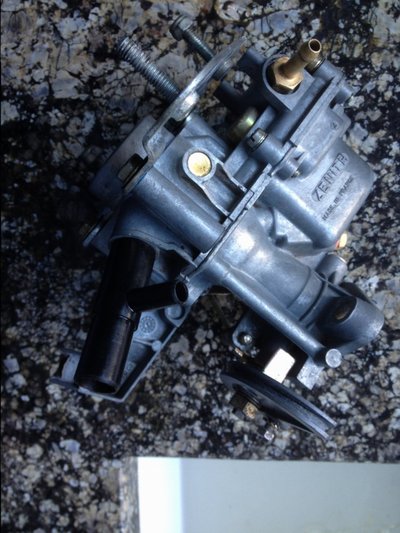
It was blasted clean though.

the manifold nuts are all new and came with the engine rebuild. They are brass as I guess they should be.
There are quite a few 7mm nuts used on R4's im discovering. These are hard to find!
Next job boil the carburettor to clean it
 
I found recently at a car show on an autojumble stand a really delightful horn - Loathed to hide it under the front wing as the original and let it get covered in muck Ive found a new site for it.

Its a great shape like a .... French Horn!! (of course ;))

Although italian it has the words 'GRAVE- LOW' BASSO-TIEF' on it.

Id like to think it sounds like Serge Gainsbourgh coughing on a gauloise cigarette ....
 
  • IMG_4033[1].JPG
    IMG_4033[1].JPG
    177.7 KB · Views: 0
Last evening I again worked into the night. The rear bumper was just as tricky as the front one to get level but then again it's got my little secret towbar concealed behind it which makes it a bit harder to do. The towbar affectively replaces two of the bumper support brackets so I've use these spare brackets to good effect to hold the reversing light and fog light.
 
  • image.jpeg
    image.jpeg
    110 KB · Views: 3
  • image.jpeg
    image.jpeg
    146 KB · Views: 3
  • image.jpeg
    image.jpeg
    289.2 KB · Views: 3
  • image.jpeg
    image.jpeg
    122.7 KB · Views: 3
  • image.jpeg
    image.jpeg
    126.9 KB · Views: 3
Tonight before band practise I hope to fit the rear hub grease caps and split pins.

Maybe prep the driveshafts too
 
Hubble .....Bubble......I hope no TROUBLE! :vsad:

Boiling up the Carb and other greasy bits
 
  • image.jpeg
    image.jpeg
    107.9 KB · Views: 0
Zenith soup mmm tasty
Are you sure the plastic breather won't melt ?
 
Errm plastic breather ?

Um I think is ok
 
  • image.jpeg
    image.jpeg
    142.8 KB · Views: 2
  • image.jpeg
    image.jpeg
    104 KB · Views: 2
The black plastic t piece ended up in pan still on carb they break at the best of times ☺
 
Well the boiling worked.....lets hope the carb still does !

Replaced valve gaskets cleaned all jets checked float (that it did) (float that is)

Looking good
 
  • image.jpeg
    image.jpeg
    170.1 KB · Views: 2
  • image.jpeg
    image.jpeg
    141 KB · Views: 2
Plastic breather pipe survived Paul now all re mounted on the engine more to do tomorrow
 
Had a really good afternoon making good a crumby old exhaust pipe. I had intended replaceing it but I had just enough gas left in my mig welder and a tin of aluminium heat resisting paint.
 
  • IMG_4063[1].JPG
    IMG_4063[1].JPG
    199.6 KB · Views: 1
A few hours later a lot of grinding with a flap disc had the rust off. Then I took the decision to roller the aluminium paint on.

Boy did that work well!!! I got the idea from Paul (Mr Reno) using a roller to paint his chassis. It worked so well - if i ever do another chassis or exhuast roller painting is how I'll do it
 
  • IMG_4065[1].JPG
    IMG_4065[1].JPG
    137.3 KB · Views: 0
  • IMG_4066[1].JPG
    IMG_4066[1].JPG
    128.2 KB · Views: 0
  • IMG_4067[1].JPG
    IMG_4067[1].JPG
    113.6 KB · Views: 0
Then I had to make a few brackets up. Repairing the original pipe meant that all the fittings lined up correctly

Very satisfying and saved a long wait for a new one and a few quid too
 
  • IMG_4068[1].JPG
    IMG_4068[1].JPG
    95.2 KB · Views: 1
  • IMG_4070[1].JPG
    IMG_4070[1].JPG
    79 KB · Views: 1
Ok for the latest instalment this weekend in between Dad duties And attending a Wedding I've :

1/ Fitted the front transmission axles. This took much longer than it should as on the near side the clip holding the rubber fouled the bottom wishbone. The other side has more space. The only thing that could affect it is the tightening of the bottom pivot. Anyway got it done and fitted new rubber gaiters to the Calipers while I was at it
 
  • image.jpeg
    image.jpeg
    109.1 KB · Views: 2
  • image.jpeg
    image.jpeg
    109.4 KB · Views: 2
  • image.jpeg
    image.jpeg
    121.5 KB · Views: 2
  • image.jpeg
    image.jpeg
    113 KB · Views: 1
  • image.jpeg
    image.jpeg
    89 KB · Views: 4
  • image.jpeg
    image.jpeg
    125 KB · Views: 3
Back
Top