Clementine's Garage
Clementine the Cat
 
Image of flower
Yellow R4
 
Réparateur d'automobiles

1975 Renault 6TL - the fine line between brave and stupid

haha, yeah it does take a while! Sorry about that. I've actually spent some time flatting the bonnet down again, I'm still trying to get the paint thickness right as it's going on a bit heavy. I've nearly got it but needs more tuning to be just so.

Recently I got an order in online for four ball joints, which this car needs, and some cheap Cola to try on the stuck piston rings. We've also just got a new engine stand but my free time has been taken up with my other monster just lately who I've been de-bodging and welding big pieces of metal into.

20150614-07.jpg


20150614-08.jpg


Renault is patiently waiting its turn. It's safe while it waits and it will get done, just going to take me a little while before I can get really involved with it. Now the welder is working properly I can pull the rest of those dents in the roof and even get the gutters fixed providing I can get some suitable donor sections sourced to make my life easier. It's such a simple little car I can't see it causing too much grief to put right.
 
I'm still hunting for pre-made gutter sections for the Renault, they don't have to be specifically for the 6, it's just that pre-made ones will save me a lot of time in fabrication. Since recent welding successes on the Princess I'm feeling confident I can actually sort the gutters out on the Renault myself. I can definitely do the new headlining and carpet that will be needed.

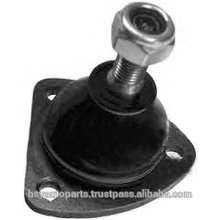
Of the four ball joints I ordered, 2 turned up and 2 I was refunded for as they were out of stock. Are upper and lower ball joints different? Listings for this component seem contradictory in this regard.

The Princess is still keeping me from working on the Renault while I try to get her ready for an MoT. A few more cosmetic patches and a little mechanical fettling will see her ready for the MoT man, just a case of having the time. Once that's achieved I can turn my attentions more properly to the Renault again.
 
Lower swivels are still listed for renault 4 at my local factors using the autocat system bought one recently for 9+vat
However it no longer list top swivels as being available they are different top and bottom but both top are the same each side
The lowers are handed and apart from pre 68 cars the only reason for year differences on listing is because the riginal swivels which were rivited used 6mm fixings which changed to 7mm on later cars easily sorted with a drill if necessary
I ended up buying 1 top swivel off ebay and not all sellers seem capable of correctly listing parts so I made sure the picture was correct and mine was fine think I paid 12
 
Not a huge progress to report here, just that the engine is no longer sat on a crate it is now on a proper stand. This is very useful, even if it was tricky fitting a tiny engine to a large stand.
20150629-01.jpg


The pair of ball joints I got look like this, which I bought from a listing as upper ball joints. From what you're saying I'm expecting the lowers to be a different design.
BALL_JOINT_UPPER_RENAULT_4_RENAULT_5.jpg_220x220.jpg
 
Rather than Cola, fed some brake fluid into the bores to do the unsticking. Seems to have at least found its way past the pistons so that's an improvement but it'll take time for things to work free, taking the patient approach with it for now.
 
Even if you free it off there will be rust pitmarks in bores which even honing will be very unlikely to remove and as you've gone as far as removing engine you will probably end up buying pistons and liners
 
True. We'll see what it needs when it's unstuck. There's a good local engine rebuilder I'll likely send it all to if it needs work.
 
Since my last update NOTHING has happened. Too much work, not enough time and a change of daily driver has put paid to any opportunity to work on the little Renault. I have found a local supplier for some of the parts I need which I'll be chasing up once I have the time so I can hopefully at least get the little Renault back on its wheels which will make getting into the unit for the roof repairs an awful lot easier. My plan presently is to make it rollable again and get what little welding I'm aware of sorted so it's all watertight for the winter as it's unlikely I'll have any indoor space for the poor thing this year.

Sadly, the little Renault is at the bottom of my project pile and with indoor space currently at a premium I can't get a lot of the jobs done that require use of said space. Still, nothing is getting any worse, the rust isn't growing, the car isn't filling up with water, so it will get done eventually.
 
Actually, something did happen now I wrote all that. Cleared the brake fluid out of the bores which had done a great job of cleaning off a lot of black deposits and replaced with diesel. Some diesel went through but the majority didn't. It looks likely now that it's a seized crank so that will get unbolted and we'll see if we can get the block stripped down ready for a rebuild. Definitely won't be back on the road this year.
 
Been a while but today got some time in on this little green disaster zone. At present the car is all bundled up like a festive gift in a lovely blue tarpaulin to keep it safe and dry and efforts so far to un-seize the engine have been utterly in vain. So it was determined that today we'd see if it was the pistons, camshaft or crankshaft that was seized or a combination of all three.


Ordinarily for a first-time job like this I'd take a photo-diary of what was done but with the components being rather slimy-oily, using a camera wasn't a particularly good idea. Suffice to say the whole job was relatively easy, the only slightly more involved part being removing the woodruff key from the washer on the camshaft and then not losing the woodruff key. Everything was carefully wiped free of oily gunge with the exception of camshaft and crankshaft which I don't want to flash-rust as I'm not sure how long it'll be before I put this all together again. The other thing to be sure of is that everything was put away in order, with labels, so I don't lose anything, particularly vital for this sort of job.


With the block upside-down it was easy to unfasten the pistons first, this did drop the liners out of the block which I'm told isn't ideal but also that it's not the end of the world. I was expecting the liners to have some resistance to coming out but they didn't, they were really easy to remove. The pistons are really firmly stuck too so they'll be getting a bath in hot engine oil as a last ditch attempt to free them, there was no way these were coming out in situ.

20150828-01.jpg


The rest of the internals were carefully removed and set aside, all the various bolts that go in the block were put back in their respective holes so I don't lose them and things like the pushrods and head bolts were stored in some labelled cardboard for the same reason.

20150828-03.jpg


With the block now free of everything I could see quite a lot of orange gunge in the water jacket which can't have helped with historic issues this little engine has had. It also means getting a new radiator or refurbishing my existing one is a must, if this is what's in the engine there's going to be more of it throughout the coolant system and that all needs cleaning out.

20150828-02.jpg


The block and sump were pressure washed to get the worst of the gunk out, they'll get a deeper clean before the rebuild.

20150828-04.jpg


20150828-05.jpg


The good thing is that most items inside the engine are in good order. The piston bearing shells look re-usable and if the liners and pistons can be persuaded to part company there's a chance they will just need a clean/hone and new piston rings before going back in the car. The paper gasket under the liners will need replacing. Crankshaft and camshaft are both good too, neither showing obvious signs of scoring or excessive wear.


The one item that showed wear were the main bearings, some of which are badly scored, so I'll need a full set of those.


I'll get some snaps of the other bits and pieces that were done at a later date. The oil pick up/strainer is now lovely and clean after being de-gunged and the sump looks to be in pretty good order and just needs an exterior repaint. Overall I'm quite happy with this. Parts for the engine appear to be quite cheap and with it being so small and easy to work on it shouldn't cost much in time or money to get it all back together and functional again.


I just need to find a new set of main bearing shells, paper gasket for under the liners, a set of piston rings and pay a company to check the shafts and hone/clean the liners if we can get the pistons out of them and get the block properly cleaned before rebuilding it all. I'll also need a new head gasket, I put the cart before the horse and rebuilt and refitted the head not long after getting the car back from Wales without un-seizing the pistons, silly me.
 
I don't think those pistons are going to come out! On my engine, I cut out a circular piece of wood, exactly the same size as the piston, placed it on top of the piston and tapped gently with a hammer
 
I think hammers and the like are the solution, what a nuisance. I always seem to end up using hammers to fix things.

--

Since I've been fiddling about with the engine tonight, here's some pictures I didn't provide last time. First up the oil pick-up/pump/strainer thingy. This was all gunged up and the spindle was not that free moving but after a soak in some cleaner and a bit of a scrub it's lovely and almost sparkly and the spindle moves much better now.

20150829-01.jpg


20150829-02.jpg


A sample section of the camshaft. It's all like this. There's no sign of excessive wear or scoring from what I could see so I'm hoping it needs little more than a good clean. More experienced eyes may see issues I'm not aware of on this component.

20150829-03.jpg


The main bearing shells didn't look as bad as I remembered. There are a few scores on a couple of the shells but not the mess I'm sure was there when I removed them. Perhaps they just aren't as bad as I thought. Can these be reused, do we think?

20150829-04.jpg


20150829-05.jpg


Finally tried a bit of home cooking. Didn't achieve anything bar cleaning the surface of the piston head that's visible outside of the liner. I won't be doing more of this at home even if it does help, I hadn't realised just how much of a stink it would make and the kitchen now has that satisfying odour of a well used garage, which isn't a smell I really want in the kitchen.

20150829-06.jpg


I'll keep plugging away, we'll get there eventually.
 
They look reusable. You could do the "finger nail test". If your finger nail catches on a scratch, then you have a problem. The bearing shells should also go back to the same place on the crankshaft, so keep them in order.
 
The other side of the bearing shells are numbered, the white tags on the pistons-liner combos is numbering. In fact, everything that was removed, even the head bolts, are numbered and kept in order for reassembly. I have learned my lesson about not labelling things on some of my very first forays into this sort of thing and now I do it by rote.
 
After yesterday being a bit of a no-go on the car front, today was much better. I got out one of my favourite tools and used it in conjunction with a lump of wood and a big old bench vice.
20150831-01.jpg


It was surprisingly easy to free all four pistons from their liners and I'm delighted about that.
20150831-02.jpg


None of the piston rings were broken and the pistons themselves look in good order. There's no obvious sign of steps, scores or other damage in the liner bores either which I'm delighted about. The next step is definitely to get everything cleaned up and assessed properly to work out what I do and don't need to replace before rebuilding this little engine. Feeling much more positive about it all.
 
It is well worth fitting new poston rings and bearings while the engine is in bits. Both are fairly cheap.
 
I can find most of the bits but I'm having trouble locating the paper gasket thing that goes under the liners, where should I go for that? In fact, any recommendations for suppliers are welcome so I can add them to the little list I've been building.

My gut feeling with this engine is that it overheated, blew the head gasket and was then parked which in turn led to the pistons seizing. It's probably the only reason its survived until today, I can't see it surviving if it had been repaired.
 
I had trouble finding the paper gaskets too. I had a fair bit of stuff from mecaparts. The gaskets might have been from the local engine shop. If you are having the head skimmed (worth it after a head gasket failure) you could try yours.
 
I'll probably get it cleaned up a bit better and trundle over to see what they want to rebuild it. If it's cheap enough then I'll let the shop do it for me, if not I'll DIY. Providing I can get the right gasket paper thickness I could always make the under-liner gasket myself.
 
Back
Top