You are using an out of date browser. It may not display this or other websites correctly.
You should upgrade or use an alternative browser.
You should upgrade or use an alternative browser.
R4 GTL 1985 Restoration
- Thread starter JdeW
- Start date
JdeW
Enthusiast
- Messages
- 1,161
- Location
- Laarbeek The Netherlands
Thanks mojobaby, it isn't that much work but doing all those bits, parts and components it's only time consuming.nice work on the starter motor, looks new again
In a few weeks I can start on the chassis starting the real rustoration and

JdeW
Enthusiast
- Messages
- 1,161
- Location
- Laarbeek The Netherlands
Thanks Jurjen, some day I will race youWow, good progress! Love to see to spin that engine!

petak
Enthusiast
- Messages
- 1,917
- Location
- Vodice, Croatia
What do you use for cleaning...especially that gearbox....
And how do you know if gearbox parts are worn and need to be changed.....
I have one gearbox and planing to open it and renew....that is why i have questions about it.
Fantastic job you are doing......slowly and patiently.....thru all parts....it will be easier later when assembly start
And how do you know if gearbox parts are worn and need to be changed.....
I have one gearbox and planing to open it and renew....that is why i have questions about it.
Fantastic job you are doing......slowly and patiently.....thru all parts....it will be easier later when assembly start
JdeW
Enthusiast
- Messages
- 1,161
- Location
- Laarbeek The Netherlands
Hello petak,What do you use for cleaning...especially that gearbox....
And how do you know if gearbox parts are worn and need to be changed.....
I have one gearbox and planing to open it and renew....that is why i have questions about it.
Fantastic job you are doing......slowly and patiently.....thru all parts....it will be easier later when assembly start
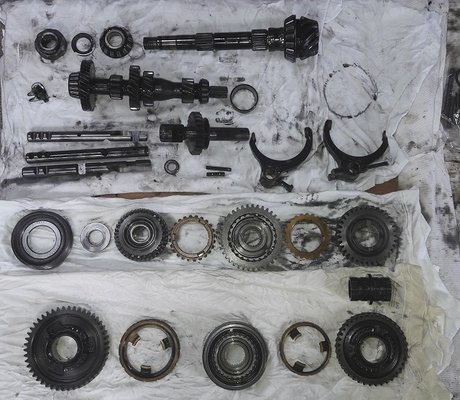
The gearbox will almost be totally revised. All the seals will be renewed, luckely the bearings aren't worn out and all the gears and synchro's are razor sharp.
I noticed that beside the gear oil (classic grade 80W90) there was an additive used, I think something like liquid MOS2 (Molybdenum disulfide).
The Haynes book is good but it doesn't show all the details from my 354 (HAO) gearbox, especially a good cross section is very handy.
Again I'll do this trick by myself, it isn't hard just do it as you said......slowly and patiently.....
Greetz, Joop
JdeW
Enthusiast
- Messages
- 1,161
- Location
- Laarbeek The Netherlands
What do you use for cleaning...especially that gearbox....
Hello again petak,
I realised I didn't answer that important first question

For the outershell of the gearbox I use a steel brush and diesel, for the innersides (gearbox and diff.box) I use an ordinary brush and diesel.
After that I use gasoline for degreasing.
After dismantling the complete innerside (main shaft, pinion shaft, gears, synchro's and more) just clean them with diesel.
On assembling keep this in mind: use gearbox oil and do everything .......slowly and patiently.....
Last edited:
JdeW
Enthusiast
- Messages
- 1,161
- Location
- Laarbeek The Netherlands
Again, time for an update in this rose month, although in a full restoration all is not yet rosy either... Sometimes unexpected, inexplicable things happen and for ease I put these in the "small disasters" category. I'll come back with tasty examples later, but for now let's go on with the gearbox.
Of course we work in a clean greasy place with all the parts in their order.
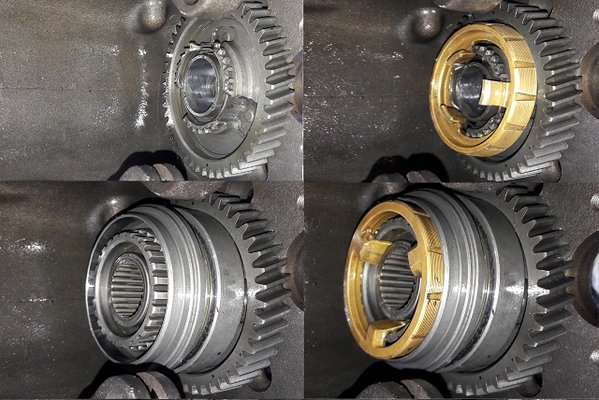
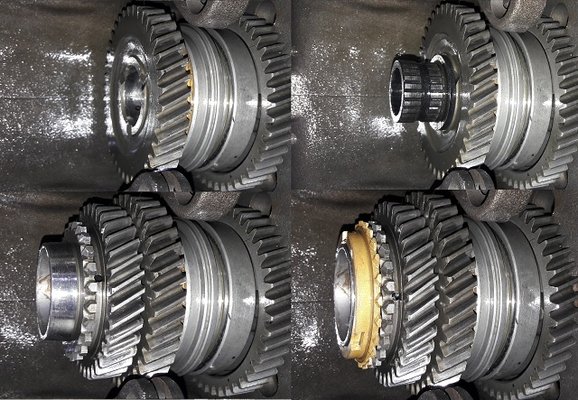
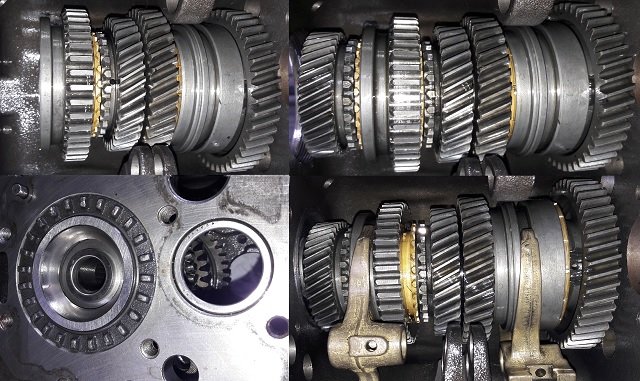
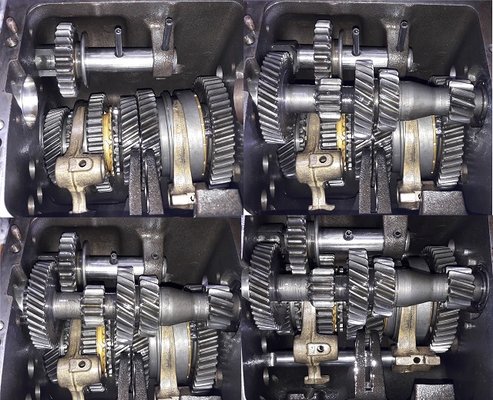
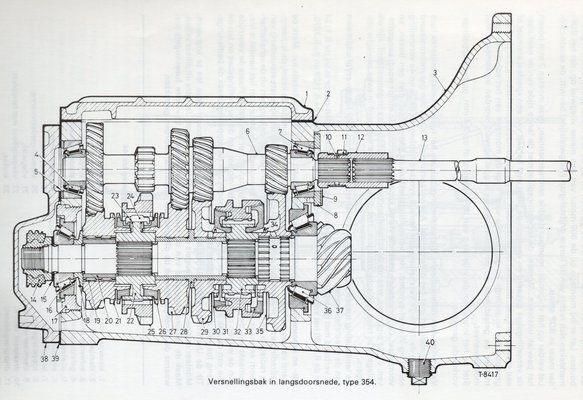
TIP: A very good cross section drawing of a 354 (HAO) gearbox is essential for the proper assembly of the 2 different types of synchromesh hubs.
The 3rd / 4th synchro is of the Borg-Warner type, the 1st / 2nd synchro is of the Renault type.
A few photographs of the step by step compilation and ensure that all parts are properly immersed in gearbox oil.
When we will fill the gearbox later we can add an additive. You really do not need to purchase a 20 gram liquid MOS2 tube, there is a much better and virtually free alternative.
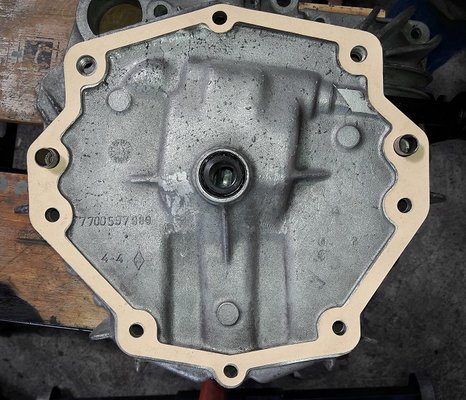
Gasket Bellhouse and think of the seal.
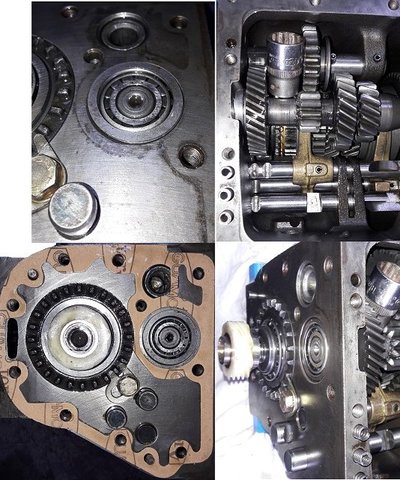
To tighten everything, we shift two gears simultaneously, in this way we lock the gearbox.
Filler rings primary shaft and gasket front cover.
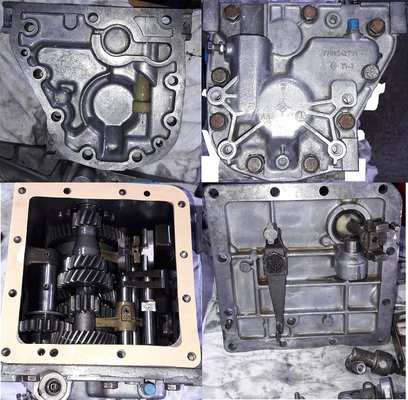
Lids...
And for the time being it's finished.
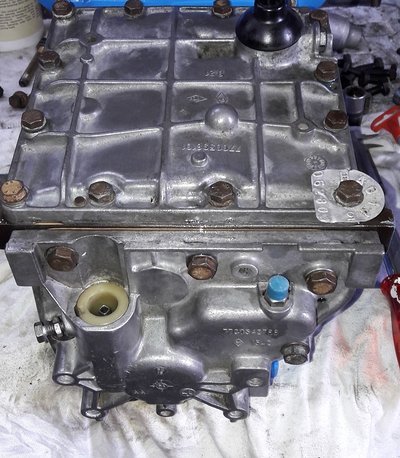

Of course we work in a clean greasy place with all the parts in their order.
TIP: A very good cross section drawing of a 354 (HAO) gearbox is essential for the proper assembly of the 2 different types of synchromesh hubs.
The 3rd / 4th synchro is of the Borg-Warner type, the 1st / 2nd synchro is of the Renault type.

A few photographs of the step by step compilation and ensure that all parts are properly immersed in gearbox oil.


When we will fill the gearbox later we can add an additive. You really do not need to purchase a 20 gram liquid MOS2 tube, there is a much better and virtually free alternative.
Gasket Bellhouse and think of the seal.

To tighten everything, we shift two gears simultaneously, in this way we lock the gearbox.
Filler rings primary shaft and gasket front cover.

Lids...

And for the time being it's finished.


Last edited:
JdeW
Enthusiast
- Messages
- 1,161
- Location
- Laarbeek The Netherlands
Indeed it LOOKS complicated but it's actually not that difficultI hope I never have to do that, it looks extremely complicated

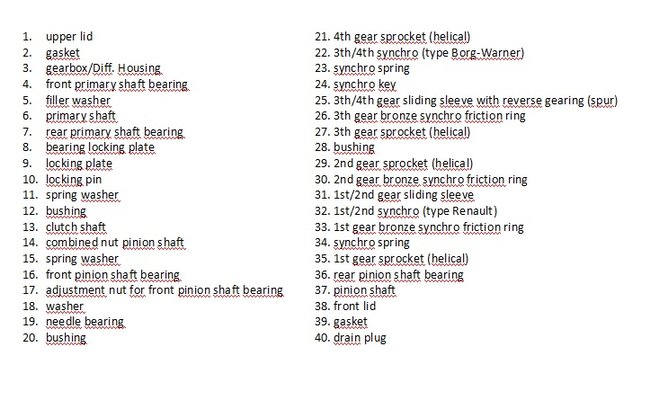
For those who are interested, hearby the cross section and part descriptions.
I tried to translate the parts as best as I could, so a little technical expertise from forum members might aid to a better translation

Last edited:
JdeW
Enthusiast
- Messages
- 1,161
- Location
- Laarbeek The Netherlands
Thanks Jurjen but it's really not that difficultHoly wow! Seems like a difficult rebuild, well done! Just curious, what's your next step? Keep up the good work!

Next step will be the reunion of engine and gearbox and put it aside. During engine and gearbox revision I spent time in cleaning out the front and rear suspension parts...
Chassis rustoration is the next big step
 I think you're familiar with the whole proces of cutting, welding, grinding, sanding, zinc spraying, priming etcetera. Uhm, I guess you might feel a bit nostalgic as I mention this
As for priming and painting the chassis, I won't be using rust converters and/or Epifanes, I got my eye on Brantho Korrux 3 in 1 a high-tech industrial coating, as for the cavities I'll be using Mike Sander's rust prevention grease.
So no time to loose or get bored

AdamWilkes
Enthusiast
- Messages
- 407
- Location
- Poole
I have just read some stuff about the Brantho Korrux 3-in-1 (which I've not heard of before), and it sounds amazing. I may track some down; suitable for oil-rigs, trains and childrens toys etc - non-toxic & tough as old boots. Check out the guidance/technical notes: http://brantho-korrux.co.uk/3in1 rev3_td.pdf
Mike Sanders' grease need applying at about 120 degrees Celcius/Centigrade which sounds demanding (and that's in their own promotional video!); their video shows it being used for seams & cavities only.
The various Bilt Hamber Dynax (Dynax S-50 cavity wax; Dynax UC Underbody Clear firm-coat wax - UB is brown) aerosol products seem to have good reviews - I use them all over the place! They are fluid to start with & quickly thicken more or less according to variety bought. Cavity & exposed-panels mixtures in 3/4 litre cans (with long tubes/spray-ends etc - brilliant for topping-up knocks, etc), or larger quantities for air-spraying.
JdeW
Enthusiast
- Messages
- 1,161
- Location
- Laarbeek The Netherlands
Hi Adam, well I haven't heard of Dynax S-50 before, maybe it's sold here, on the continent, on a different name?
Anyway, as for me, when to preserve and protect the cavities on our precious young- and oldtimers, I'll prefer to stick to products based on grease instead of wax...but that's my opinion. Maybe the famous German test convinced me to choose for Mike Sanders.
Anyway, as for me, when to preserve and protect the cavities on our precious young- and oldtimers, I'll prefer to stick to products based on grease instead of wax...but that's my opinion. Maybe the famous German test convinced me to choose for Mike Sanders.
JdeW
Enthusiast
- Messages
- 1,161
- Location
- Laarbeek The Netherlands
As promised hereby some "small disasters" experiences complete with our beloved pictures, and don't you reply me with the words "well Joop, that never occured to me", or "I've never seen that ever before on a Renault 4" 


Anyway folks ENJOY, because THE R4 and a forum is all about experiences, knowledge and humor!!!
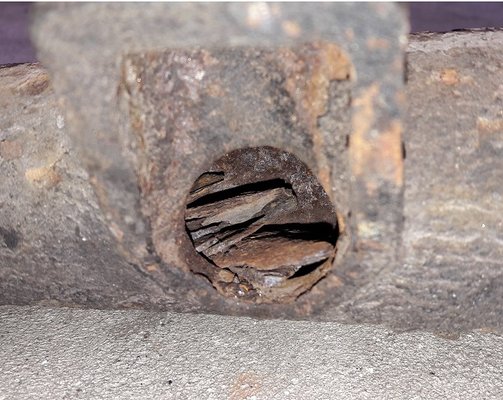
Inspecting the rear axle, and notice the pile of rust on the inside, there's still hope on the horizon.....
A glimpse on the support inside is promising as well...
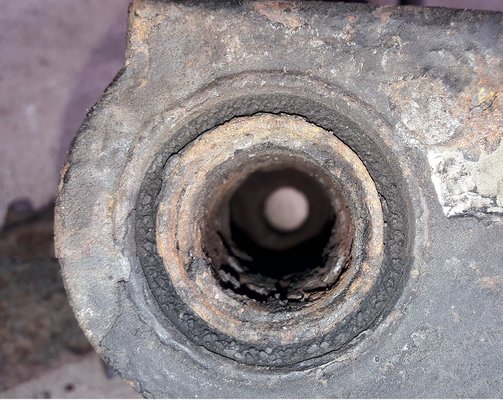
Well yeah great big M....F......S...
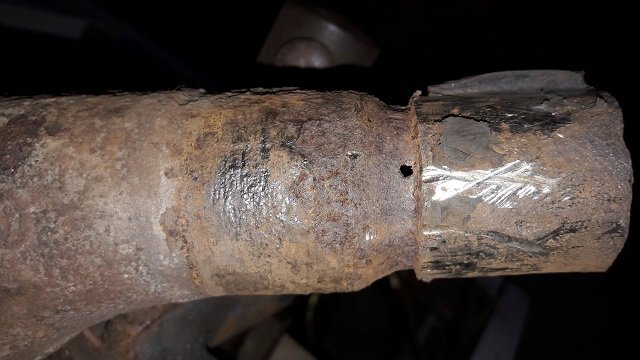
Passing MOT will be a challenge
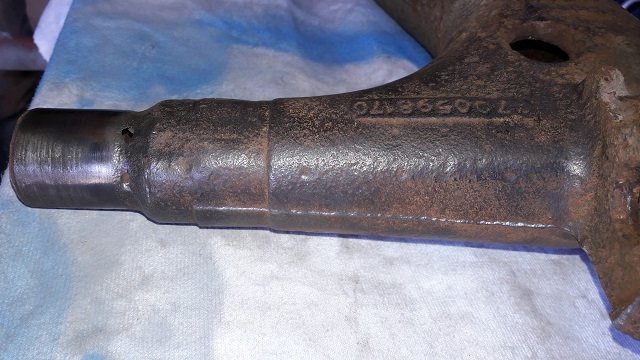
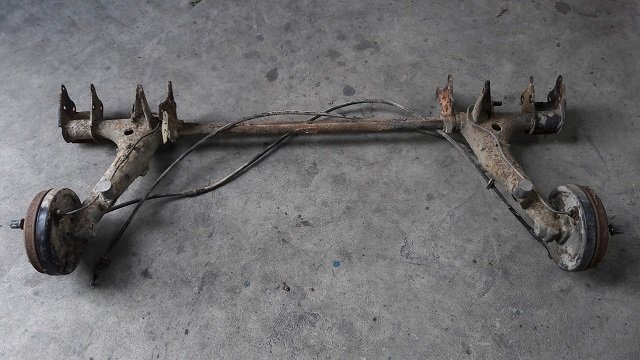
But here she is!!! An almost spotless complete rear axle replacement, so I can start al over again Yoohoo love it
Remembered the gearbox revision?
Well, on reassembly attempt No. 1, for some reason while gently sliding a shifterfork axle in place, the support (mounting) on the inside failed.... You tell me the odds on that happening....
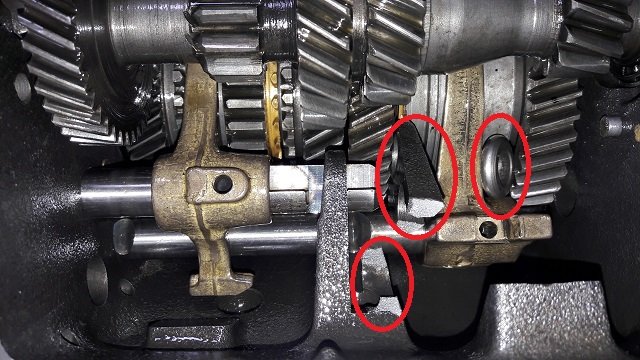
Well I found a replacement and again loved to start all over again...
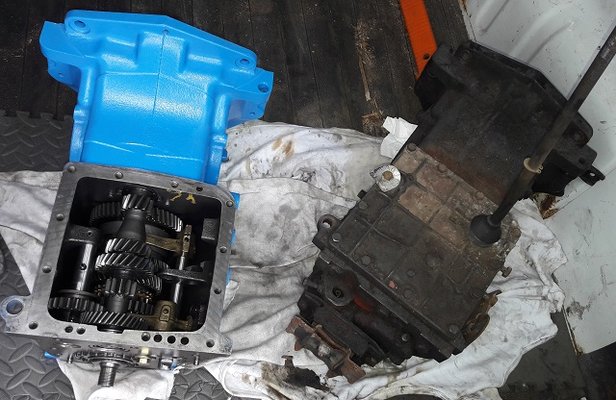
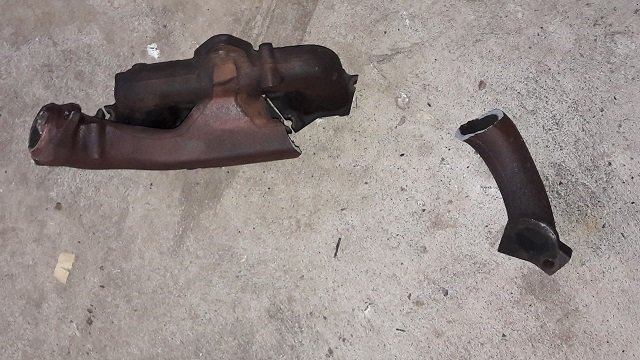
And today on this Whit Sunday I worked on the manifold and it slipped out of the vice.....
What's next folk's


Anyway folks ENJOY, because THE R4 and a forum is all about experiences, knowledge and humor!!!
Inspecting the rear axle, and notice the pile of rust on the inside, there's still hope on the horizon.....

A glimpse on the support inside is promising as well...

Well yeah great big M....F......S...

Passing MOT will be a challenge

But here she is!!! An almost spotless complete rear axle replacement, so I can start al over again Yoohoo love it


Remembered the gearbox revision?
Well, on reassembly attempt No. 1, for some reason while gently sliding a shifterfork axle in place, the support (mounting) on the inside failed.... You tell me the odds on that happening....


Well I found a replacement and again loved to start all over again...


And today on this Whit Sunday I worked on the manifold and it slipped out of the vice.....

What's next folk's

Last edited:
AdamWilkes
Enthusiast
- Messages
- 407
- Location
- Poole
I am sure and hope that you will have only good luck from now on! Very well done on your work so far - most impressive.
(Bilt Hamber Dynax spray wax underseal is available on Ebay at least.)
(Bilt Hamber Dynax spray wax underseal is available on Ebay at least.)
JdeW
Enthusiast
- Messages
- 1,161
- Location
- Laarbeek The Netherlands
Thanks Adam, I saw it on Ebay and maybe I'll use it as an underseal as I'm still searching for a good body schutz and inlinner protection.I am sure and hope that you will have only good luck from now on! Very well done on your work so far - most impressive.
(Bilt Hamber Dynax spray wax underseal is available on Ebay at least.)
Jurjenz
Enthusiast
- Messages
- 468
- Location
- Groningen, Netherlands
I have never seen that on a R4 Joop! 
Haha, no brotha - I feel your pain!
I had exact the same difficulties on the rear axle. It will be again exiting to remove the silent block mounts to see if the axles are in good condition. I'm very curious!

Haha, no brotha - I feel your pain!

I had exact the same difficulties on the rear axle. It will be again exiting to remove the silent block mounts to see if the axles are in good condition. I'm very curious!
JdeW
Enthusiast
- Messages
- 1,161
- Location
- Laarbeek The Netherlands
I have never seen that on a R4 Joop!
Haha, no brotha - I feel your pain!
I had exact the same difficulties on the rear axle. It will be again exiting to remove the silent block mounts to see if the axles are in good condition. I'm very curious!
 Yes I know Jurjen, shit happens and always will happen. I remembered you had the same with your rear axle. Now I've got the complete rear axle from a R4F6, so thicker torsionbars and the first visual inspection on the inside of the casted swingarms is OK.
Of course tension will rise on removing the old silent blocks, anyhow all silent blocks will be replaced so outside and inside.
And someday we can get a


petak
Enthusiast
- Messages
- 1,917
- Location
- Vodice, Croatia
WoW! 
Gearbox in explode view.....fantastic!
I am preparing myself (mentally) to open one that i have in garage, and still did not reach that point to start it.
This pictures and your experience will help me a lot, to courage myself to open it and do the job.
My main concern is: "How will i know if my gears and synchronous are good or bad?"
Please keep doing superb job and posting pictures of it.


