Renault 5 Mk1 Front Sill Repair
It seems mad today, but back in the 1970s most cars had an open cavity behind the front wing where mud thrown up by the front wheel could quickly rot the metalwork and then fill up the sill and rot that too.
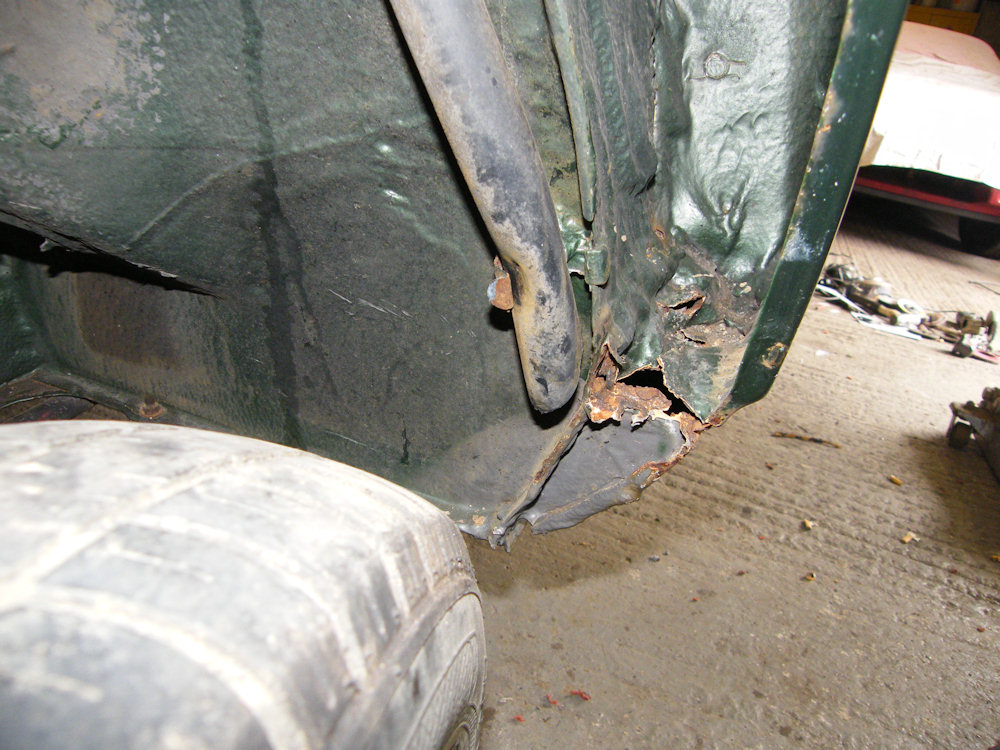
This car was saved by a very thick coat of sealant which remained in place after the metal had disappeared and stopped mud from getting into the sill.
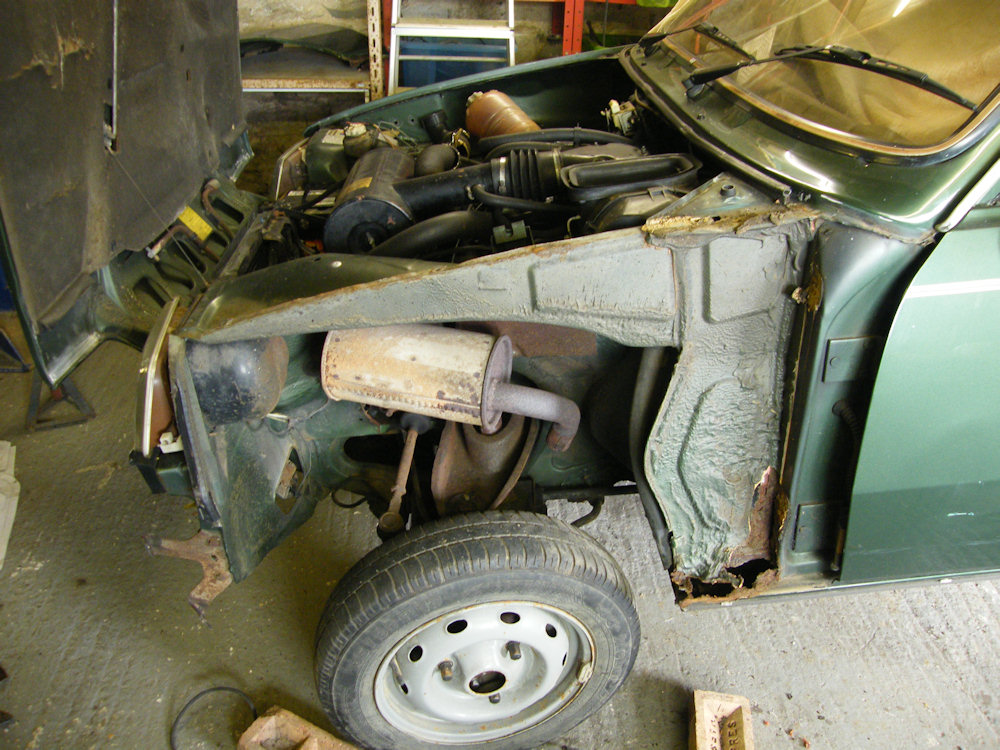
I'm planning to reuse the front wing as it's the original part and is already in the correct colour. It came off without damage once the sealant at the rear of the wing had been heated with a heat gun and the sealant cut through with a knife where the wing joined to the body at the rear. There was no sealant on the mating face which made life easier.
Underneath the rest of the wheelarch is in very good condition - the only part that needs repair is the front of the sill.
It's surprising how much metal fell out when a wire brush on an angle grinder was used to remove the remaining sealant. The top of the sill and the bottom of the A-pillar have disappeared.
More surprisingly the sill inside looks perfect and still has it's original coat of black paint. It'll need a good blow out with an air line and vacuum to remove the flakes of rust that have fallen in but is in remarkable condition.
I spent a couple of weeks preparing the Renault 4 for the 50th anniversary meeting in France, then stayed in France for a holiday. Back home I'm short of motivation to do anything let alone work on the Renault 5.
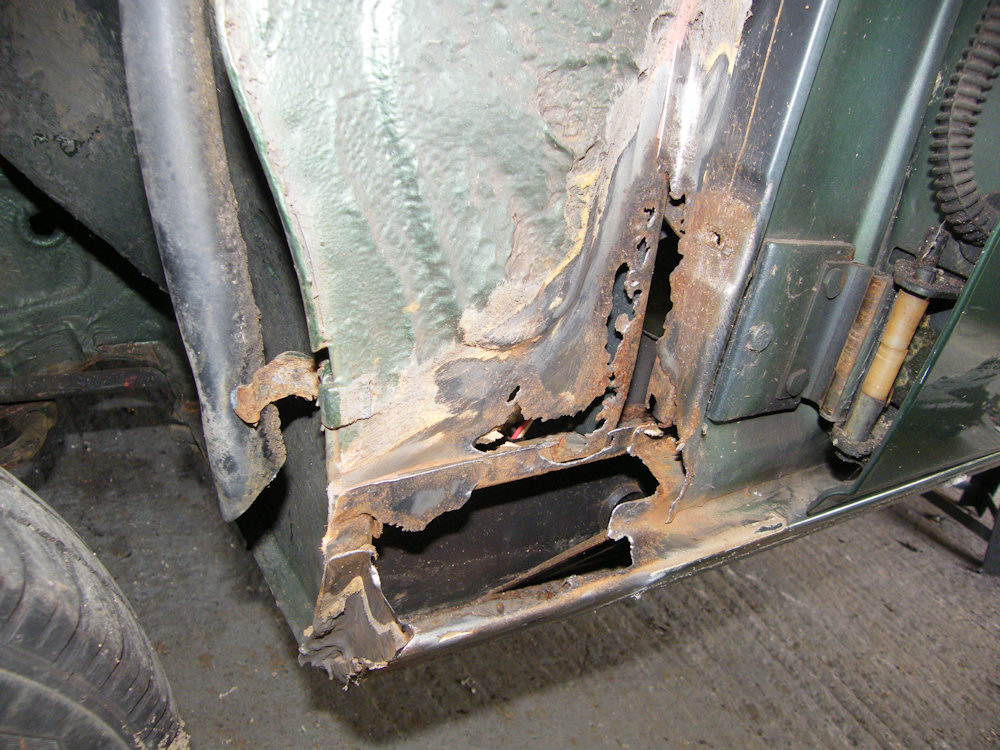
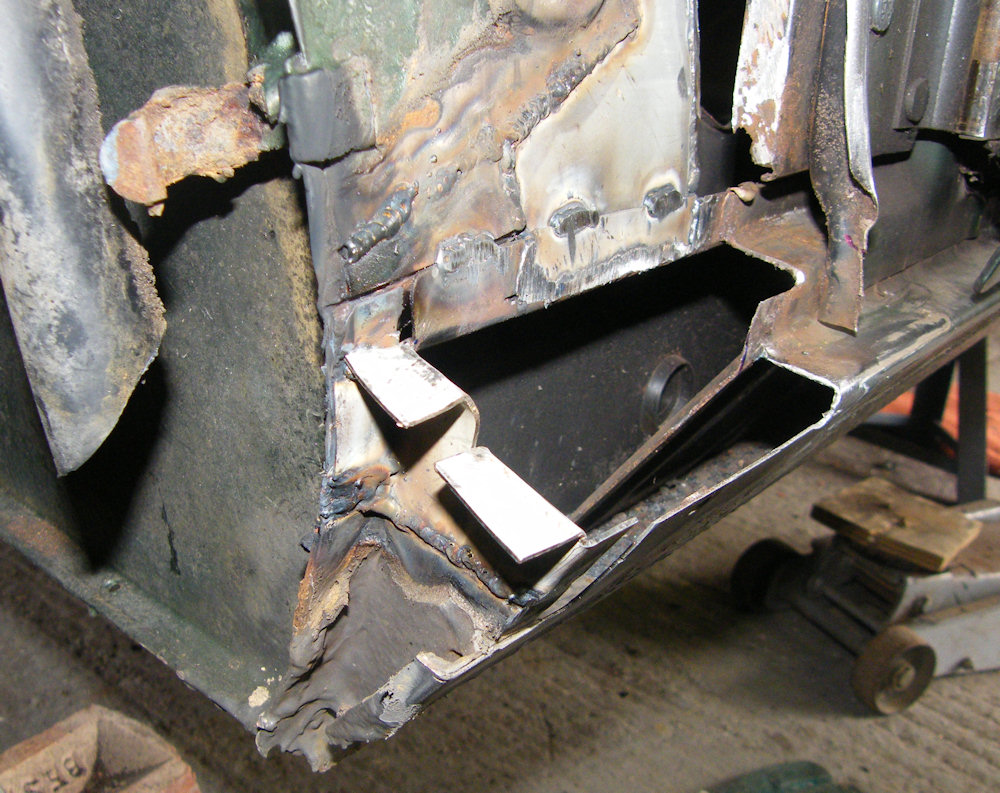
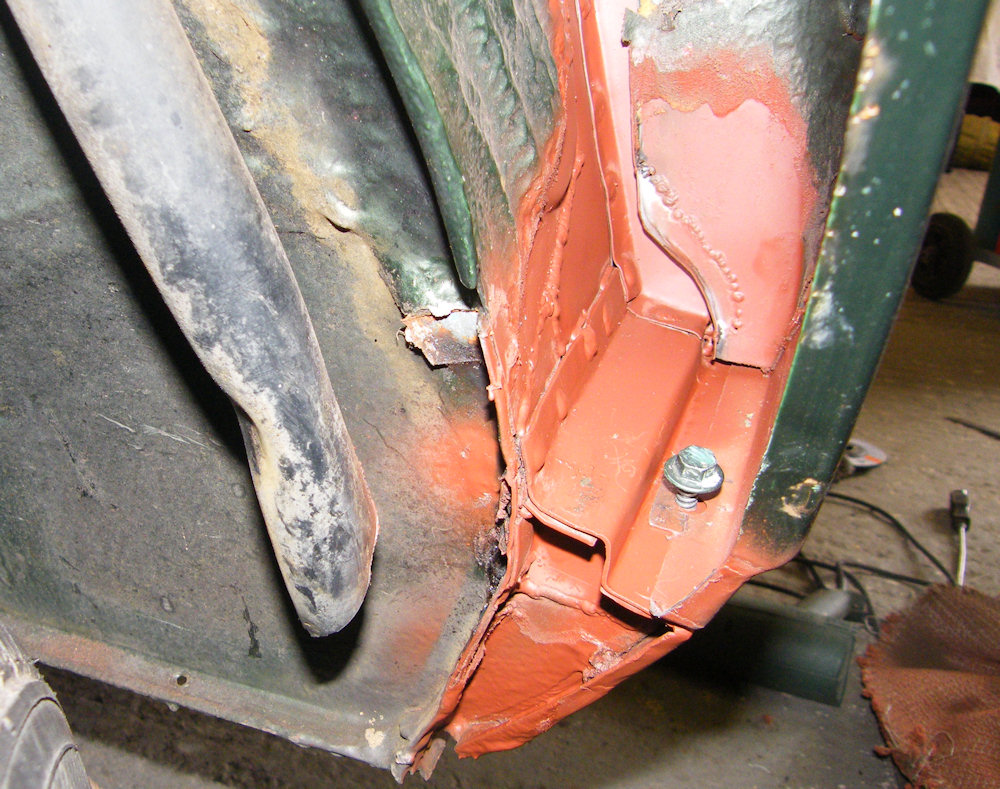
The rust was at the meeting point of 5 panels. It's just possible to cut them all back to rust-free metal, though the strange angles reflect the lack of access for an angle grinder. I forgot to take a picture of the big hole. There's already a new section butt welded into the inner panel and a small repair to the inner sill lip.
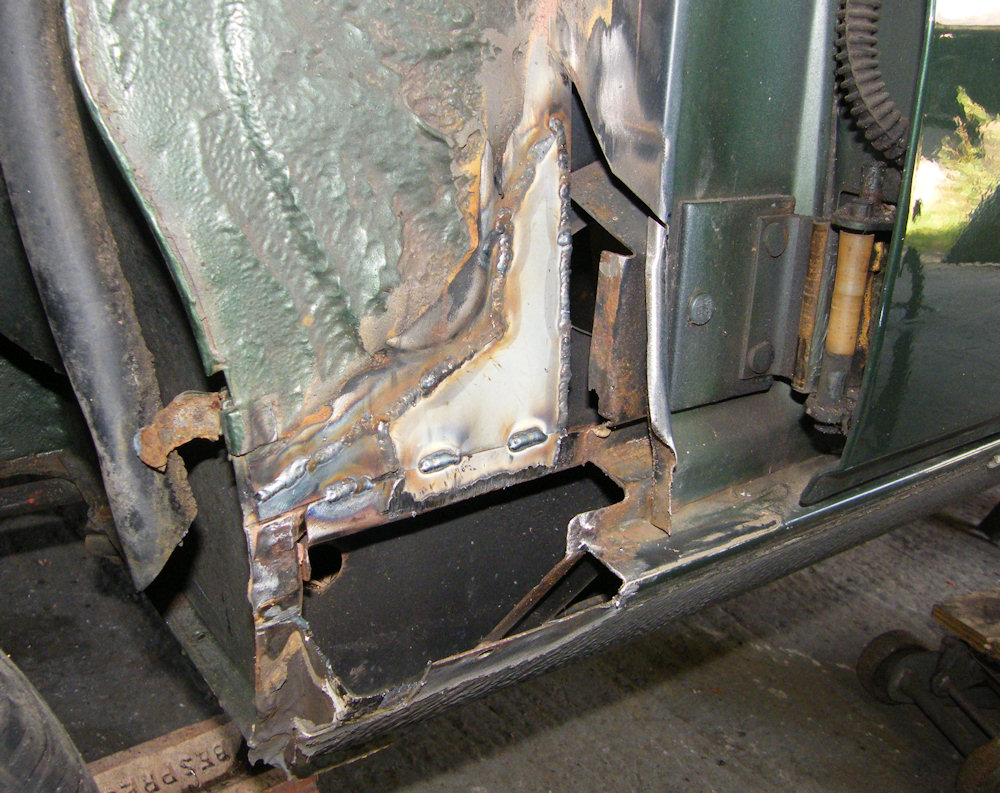
Welding in the inner section was a slow process as the other side is inside the car. I propped the bulkhead soundproofing out of the way and put some steel sheet inside to deflect any sparks, but it was still a risky business with the dash in place so I'd weld half an inch and then check inside for fires.
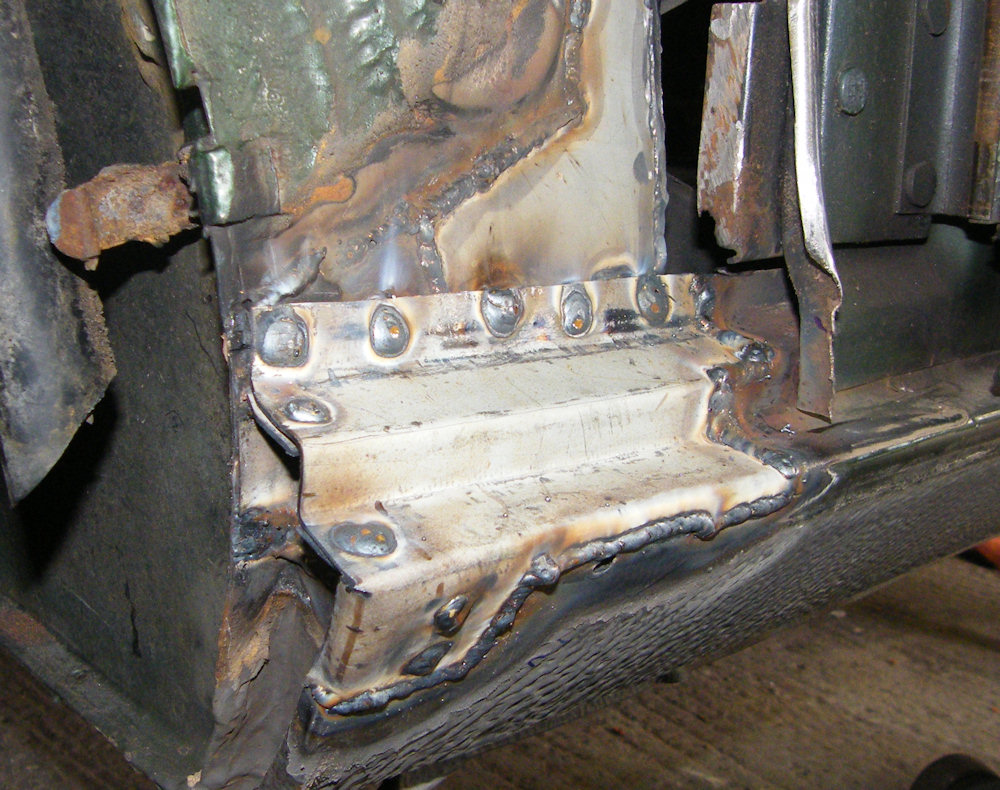
I've welded a new section to bring the front closing plate up to meet the top edge of the sill.
There wasn't enough metal left to show what the structure should have been so I guessed. Ought to have looked at photos of other cars as it turns out the stepped part of the sill curves back to the body before the end of the sill.
I have forgotten to include a mounting point for the front wing. It wasn't entirely obvious where that would have gone from the remains of the sill or the wing so it'll be a self tapping screw.
I'm getting slightly more motivated as the area comes together. Only the forward section of the A panel to go (and lots of sealant, paint, and some wheelarch liners).
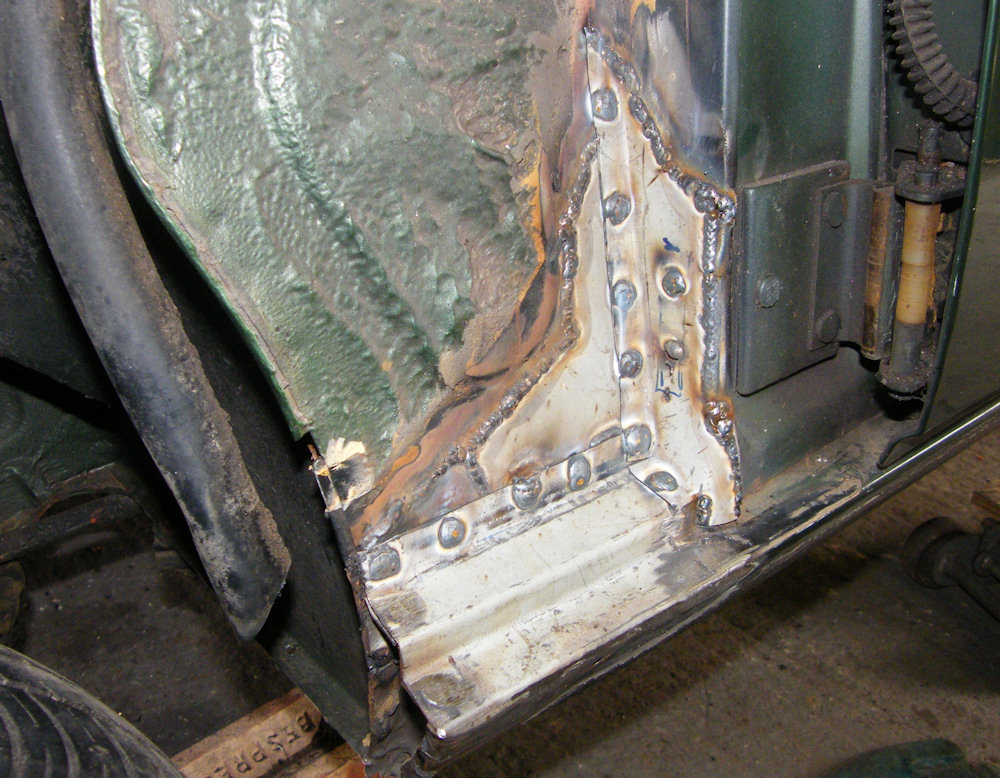
The repair to the front of the A Pillar went very well. I made a template from card as usual, cut out the steel, knocked the flange in and it fitted perfectly first time. Not often that happens.
It was only after completing the welding that I realised I'd forgotten to put in another wing mounting hole. The original wing screws will self tap to an extent, but wing sealant will have to do some of the work.
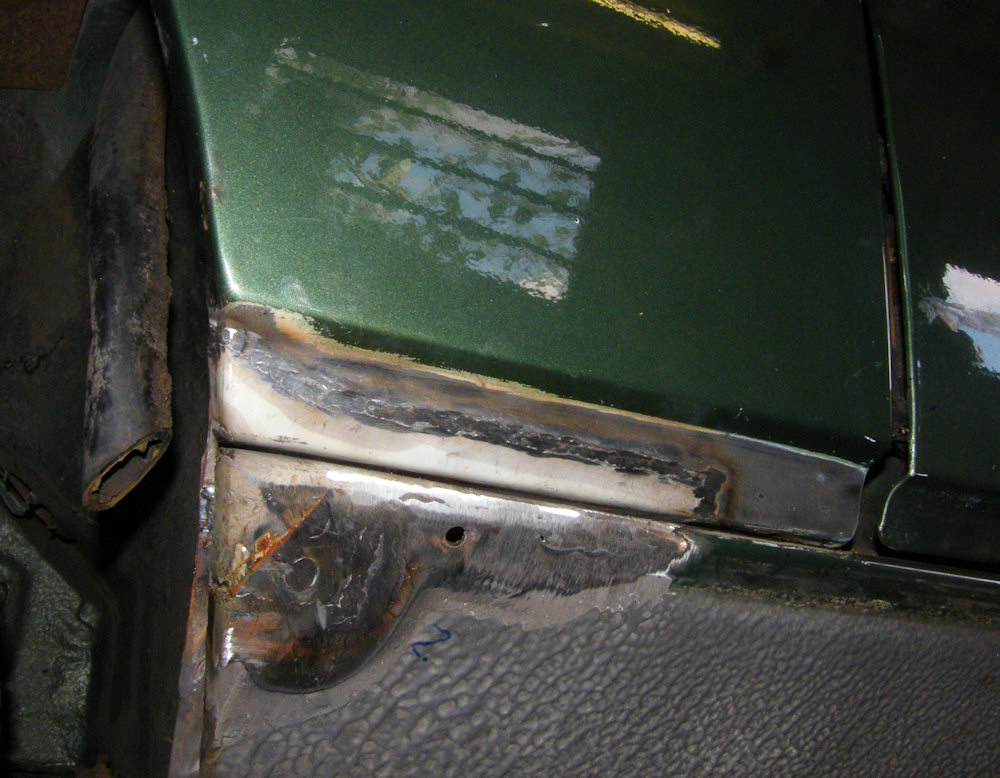
The front wing had a bit of rust on the bottom corner. The car still has the original front wings and they are in perfect condition apart from that, so rather than replace the panel and going to all the hassle of repainting it I decided to repair the original.
There was enough left to work out what the shape might have been and I made up a repair section and used that as a template to cut the rusty bit out of the wing.
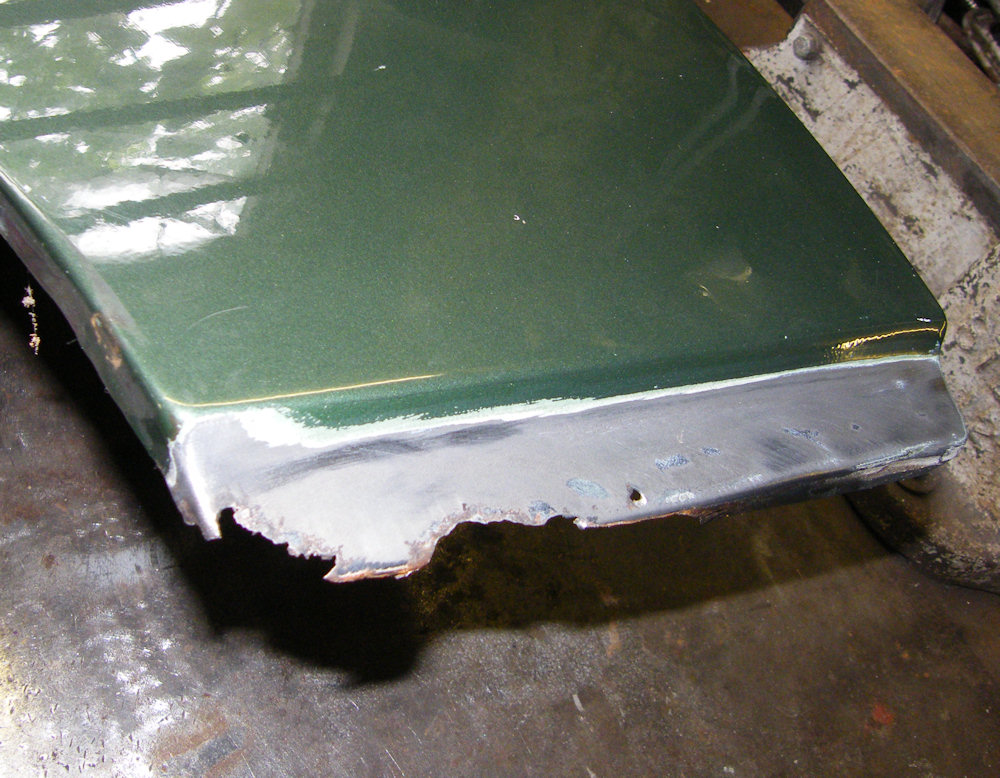
The new section was butt welded in, cleaned up with an angle grinder, then knocked flat to take out the inevitable distortion.
It ought to be reasonably convincing when the car is painted, though I realised I hadn't made the front of the sill quite the right shape and had to hammer out the flange a little to meet the line of the wing.
There was another small repair to the back of the inner structure of the wing. I'm sure that's not the correct shape either.
Later the whole area will be thoroughly seam sealed and I'm more than likely to make up a set of wheelarch liners to hide my historical inaccuracies and to keep the mud out so I don't need to do the repair again.
Last Update 5th August 2011
Next: Welding the RHS of the car
Back to: Renault 5 Restoration