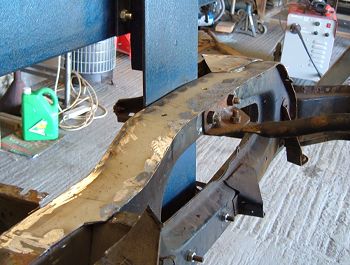
Front Chassis Rust
I've often noticed the front chassis on R4s was a little wavy at the bottom.
I've never bothered doing anything with them as it doesn't tend to cause MOT problems, but with the chassis in such a handy position I thought I'd take a look now rather than messing around under the car later.
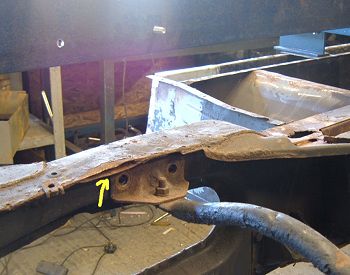
The arrow points to a seam which has opened up on the inner side of the chassis, and the rest of the lower surface is uneven too (the chassis is upside down again in the photo).
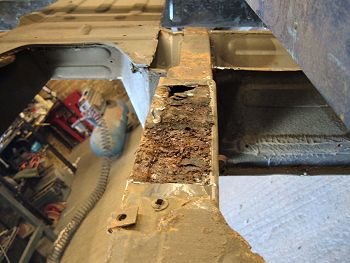
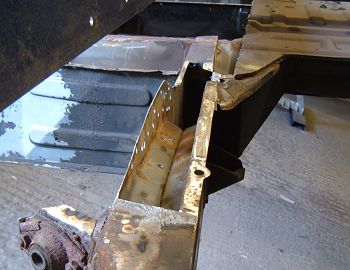
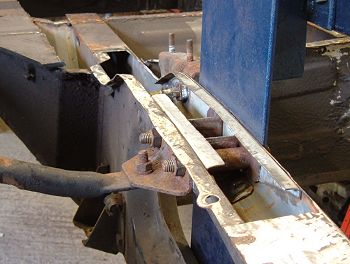
The photographs on this page may be confusing. Apart from the chassis being upside down on a roller the photographs of the repair didn't go well so they alternate between the LHS and RHS front chassis rails.
Pulling the bottom skin off the chassis revealed some fairly serious rot. Steel seems to rot in layers, and there was still plenty of good metal on the skins either side, but the rotten steel had expanded and pushed the two skins apart.
The construction is a little complex (again no photos) but the bolts holding the lower front wishbone mounting pass through this chassis rail. The bolts compress against two tube sleeves which are mounted together on a pressing that is mounted to a second pressing. This second pressing fits inside the chassis member so the area in the photograph is actually triple skinned.
There is a drain hole at the bottom that goes through all three skins, but water would most likely capillary between the skins before falling through the drain hole, hence all the rust.
The reinforcing structure was easy to remove - it was spot welded only to one side of the chassis. The remaining metal wasn't too bad, but a small repair was required on the right hand side.
The chassis looses a lot of stiffness when parts of it are removed (much of the floor pan is missing in the photos too) so I'm using a chassis jig that picks up on the suspension mounting points to hold everything in the right place. The jig is painted blue and will show up in the photos.
Here's my redesigned reinforcement in place. The thicker parts of metal to the sides are required to strengthen the suspension attachment points, but the continuous skin underneath seems to have been largely for manufacturing reasons.
My modification was to fit a reinforcement on each side of the chassis with flanges to reinforce the bottom plate that would go on later.
The crush tubes are the originals, and I've retained some of the original brackets that held them in place, but removed the part that formed a triple skin on the lower skin of the chassis.
The aim is to form the lower part of the chassis from a single skin (slightly thicker than the original to allow for the chassis to be used for jacking) so the drain hole will let water out before it gets between all the skins of metal. Waxoyl should hopefully help seal the skins.
The lower skin was plug welded to the reinforcements and the original flange, then seam welded to the side of the chassis that didn't have a flange. It's made from 1.5mm steel rather than the original 1.2mm.
I've extended the repair forward and rearwards of the main rusty bit. The main reason for this is to prevent stress concentration across the weld. I'm butt welding steel edge to edge which should be OK by itself, but to be safe the rear repair is staggered by the floor panel, and the front covered by the new radius arm bracket. It's a belt and braces approach which is always good practice to do when it's easily achievable.
Next> New floor or back to the Gordini Project

